Interface Overview
On this page
This article provides a quick overview of the Robo Gallery interface inside your WordPress dashboard — where to find things, how to navigate, and how to get started faster.
Once the plugin is installed, a new Robo Gallery section appears in the left sidebar of the WordPress admin panel. It includes the following options:
Manage Galleries – view and edit your existing galleriesAdd New Robo Gallery – create a new gallerySupport – contact form and help optionsGallery Demo – preview gallery types and layoutsVideo Guides – watch short tutorialsSettings – plugin-wide configurationAdd-ons – manage installed or available add-onsOverview – general info, plugin overview, and useful links
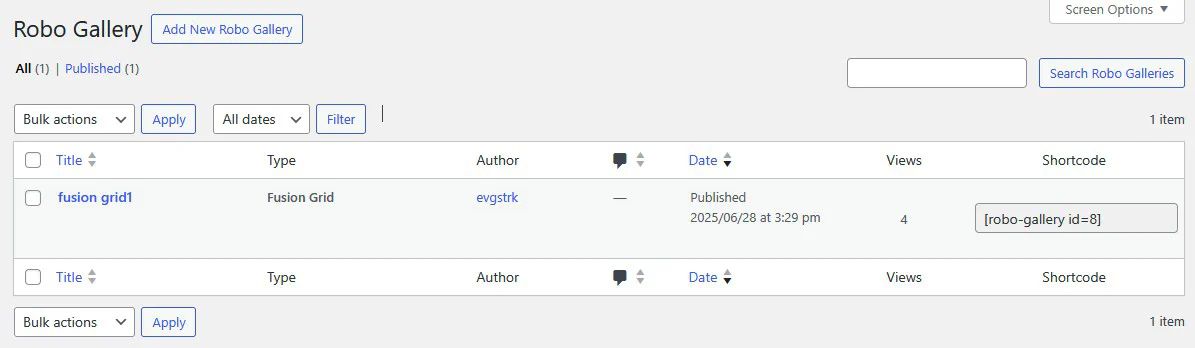
🔹 Manage Galleries#
This is where all your created galleries are listed. For each gallery, you’ll see:
Title Gallery Type (e.g. Fusion Grid)Author Publish Date Views Shortcode – use this to insert the gallery into any post or page
You can create a new gallery by clicking the Add New Robo Gallery button.
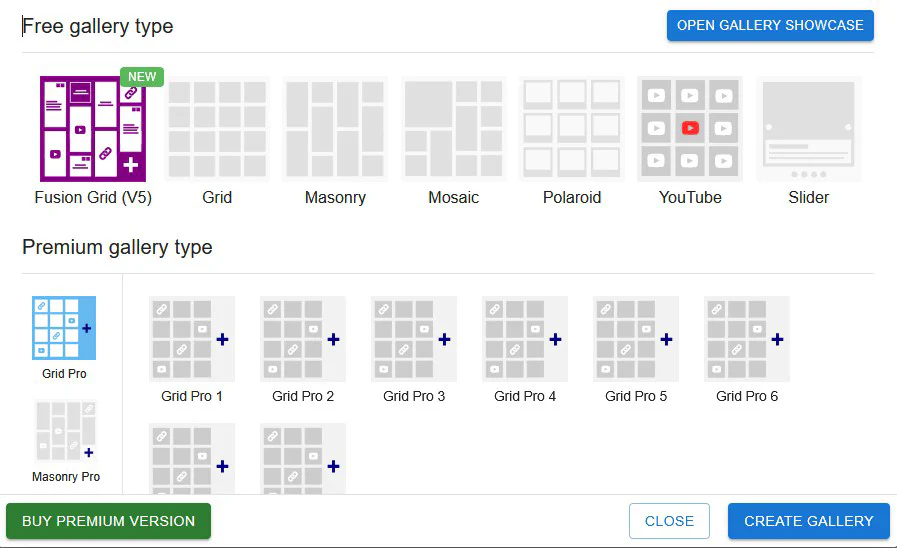
🔹 Gallery Type Selection#
When creating a gallery, a dialog allows you to select the layout type.
Free Gallery Types:#
Fusion Grid (V5) Grid Masonry Mosaic Polaroid YouTube Slider
Premium Gallery Types (unlocked via license):#
Tabs separate the layouts by style and include:
Grid Pro (8 themes)Masonry Pro (8 themes)YouTube Pro (6 themes)Mosaic Pro (6 themes)Polaroid Pro (8 themes)WallStyle Pro (8 themes)
Additionally, Fusion Grid includes advanced sub-layouts:
New Fusion Grid
Horizontal Masonry
Vertical Masonry
Justify Layout
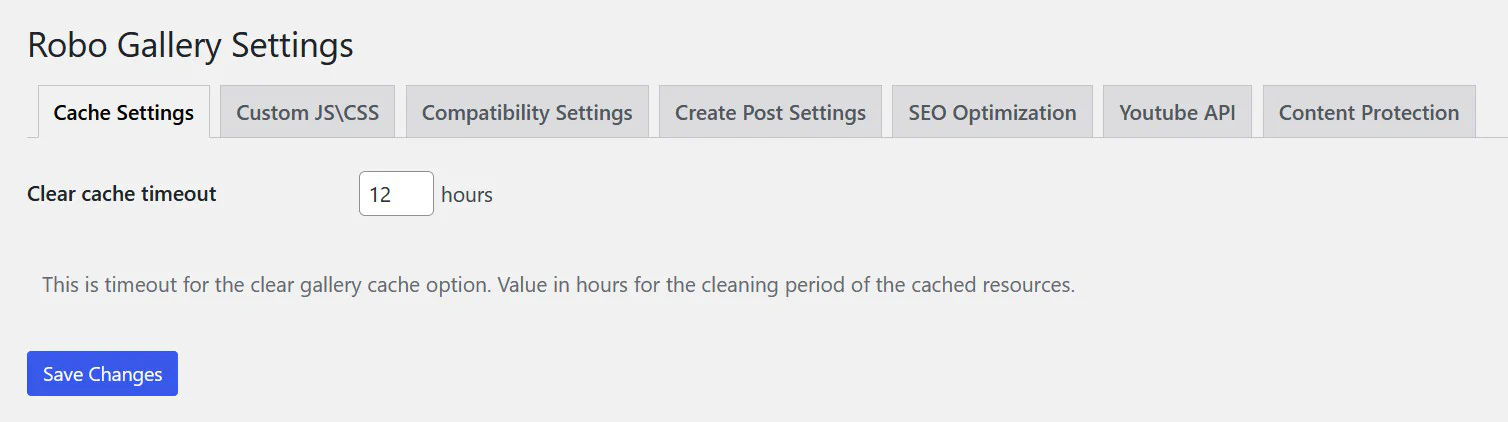
🔹 Plugin Settings#
The Settings section contains global configuration options that affect all galleries.
Main tabs include:
Cache Settings – clear cache timeout for galleriesCustom JS/CSS – add custom scripts and stylesCompatibility Settings – for resolving theme or plugin conflictsCreate Post Settings – post integration optionsSEO Optimization – advanced image SEO optionsYouTube API – connect and manage YouTube keysContent Protection – prevent image copying and interaction
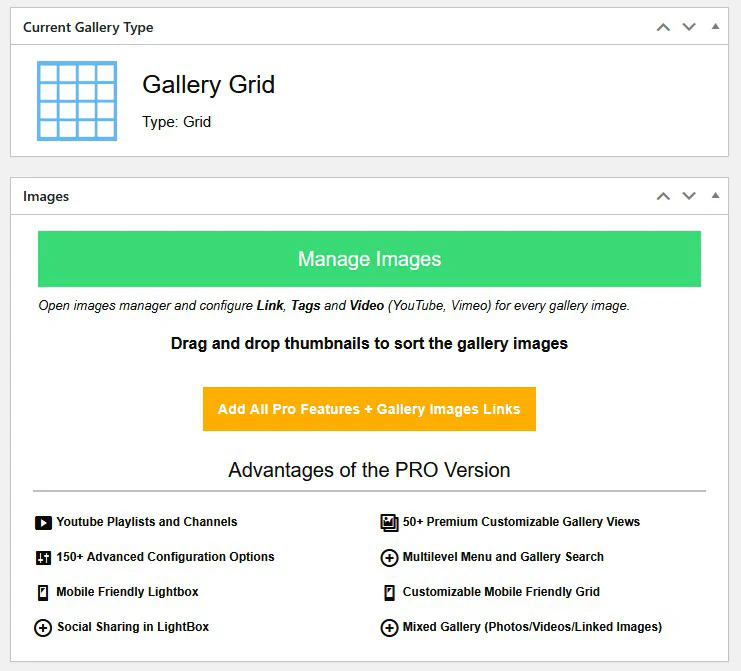
🧩 Editing Gallery Settings (Gallery Instance)#
When you open an existing gallery or create a new one, you enter the Gallery Settings Panel .
This is where you fully control the design, behavior, and media inside that gallery.
Key elements you’ll see:#
Current Gallery Type – displayed at the top of the settings panel. Shows the layout currently selected (e.g. Grid, Masonry, Fusion Grid).Manage Images Section – the place to add or edit your gallery content.
📷 Manage Images#
The Manage Images button opens Robo Gallery’s internal media manager.
From there, you can:
Upload new images or choose from the WordPress media librarySort images by dragging and droppingAdd video links (YouTube, Vimeo)Set image tags Assign custom URLs (image links)
🟢 All image control happens inside the gallery itself — there is no need to go to the Media Library manually.
If you’re using the free version, some advanced options will be locked, with a prompt to unlock premium features.
🛠 Additional Options (PRO)#
When the Pro version is activated, the gallery settings expand to include:
150+ advanced configuration options
Lightbox control and mobile optimization
Social sharing
Multilevel filtering and gallery search
50+ layout presets
YouTube playlists, mixed content (image/video/link), and more
🔗 What’s Next?#
Now that you’re familiar with the interface, you can create your first gallery or explore plugin features .
Need help? Visit the Support section or check our Video Guides .